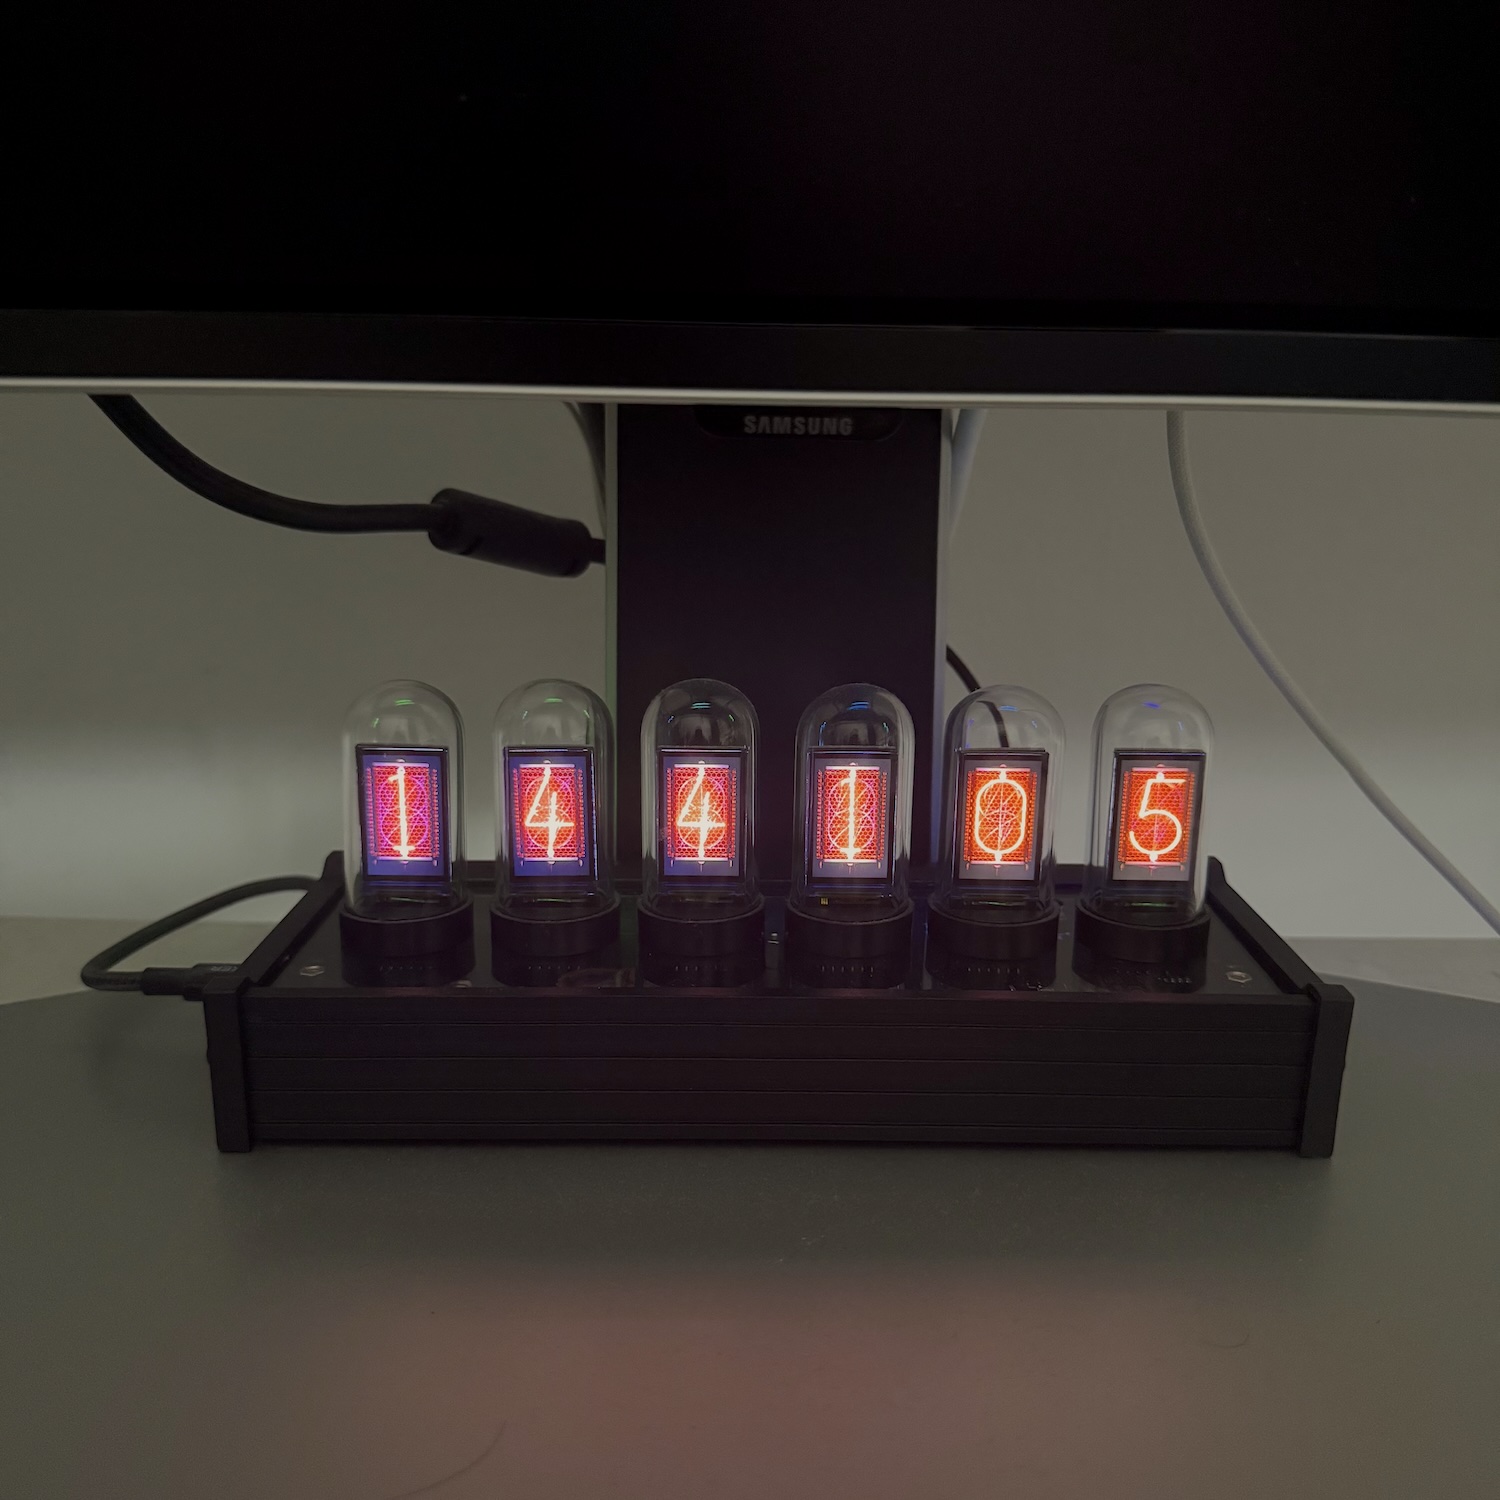
Upgrading my EleksTube clock
How I turned a sketchy EleksTube clock into a nice one
- Electronics
- Soldering
For Christmas in 2024, I got an EleksTube clock from my dad. I didn't ask where he got it, since it is not an official model but a clone called PunkCyber IPS.
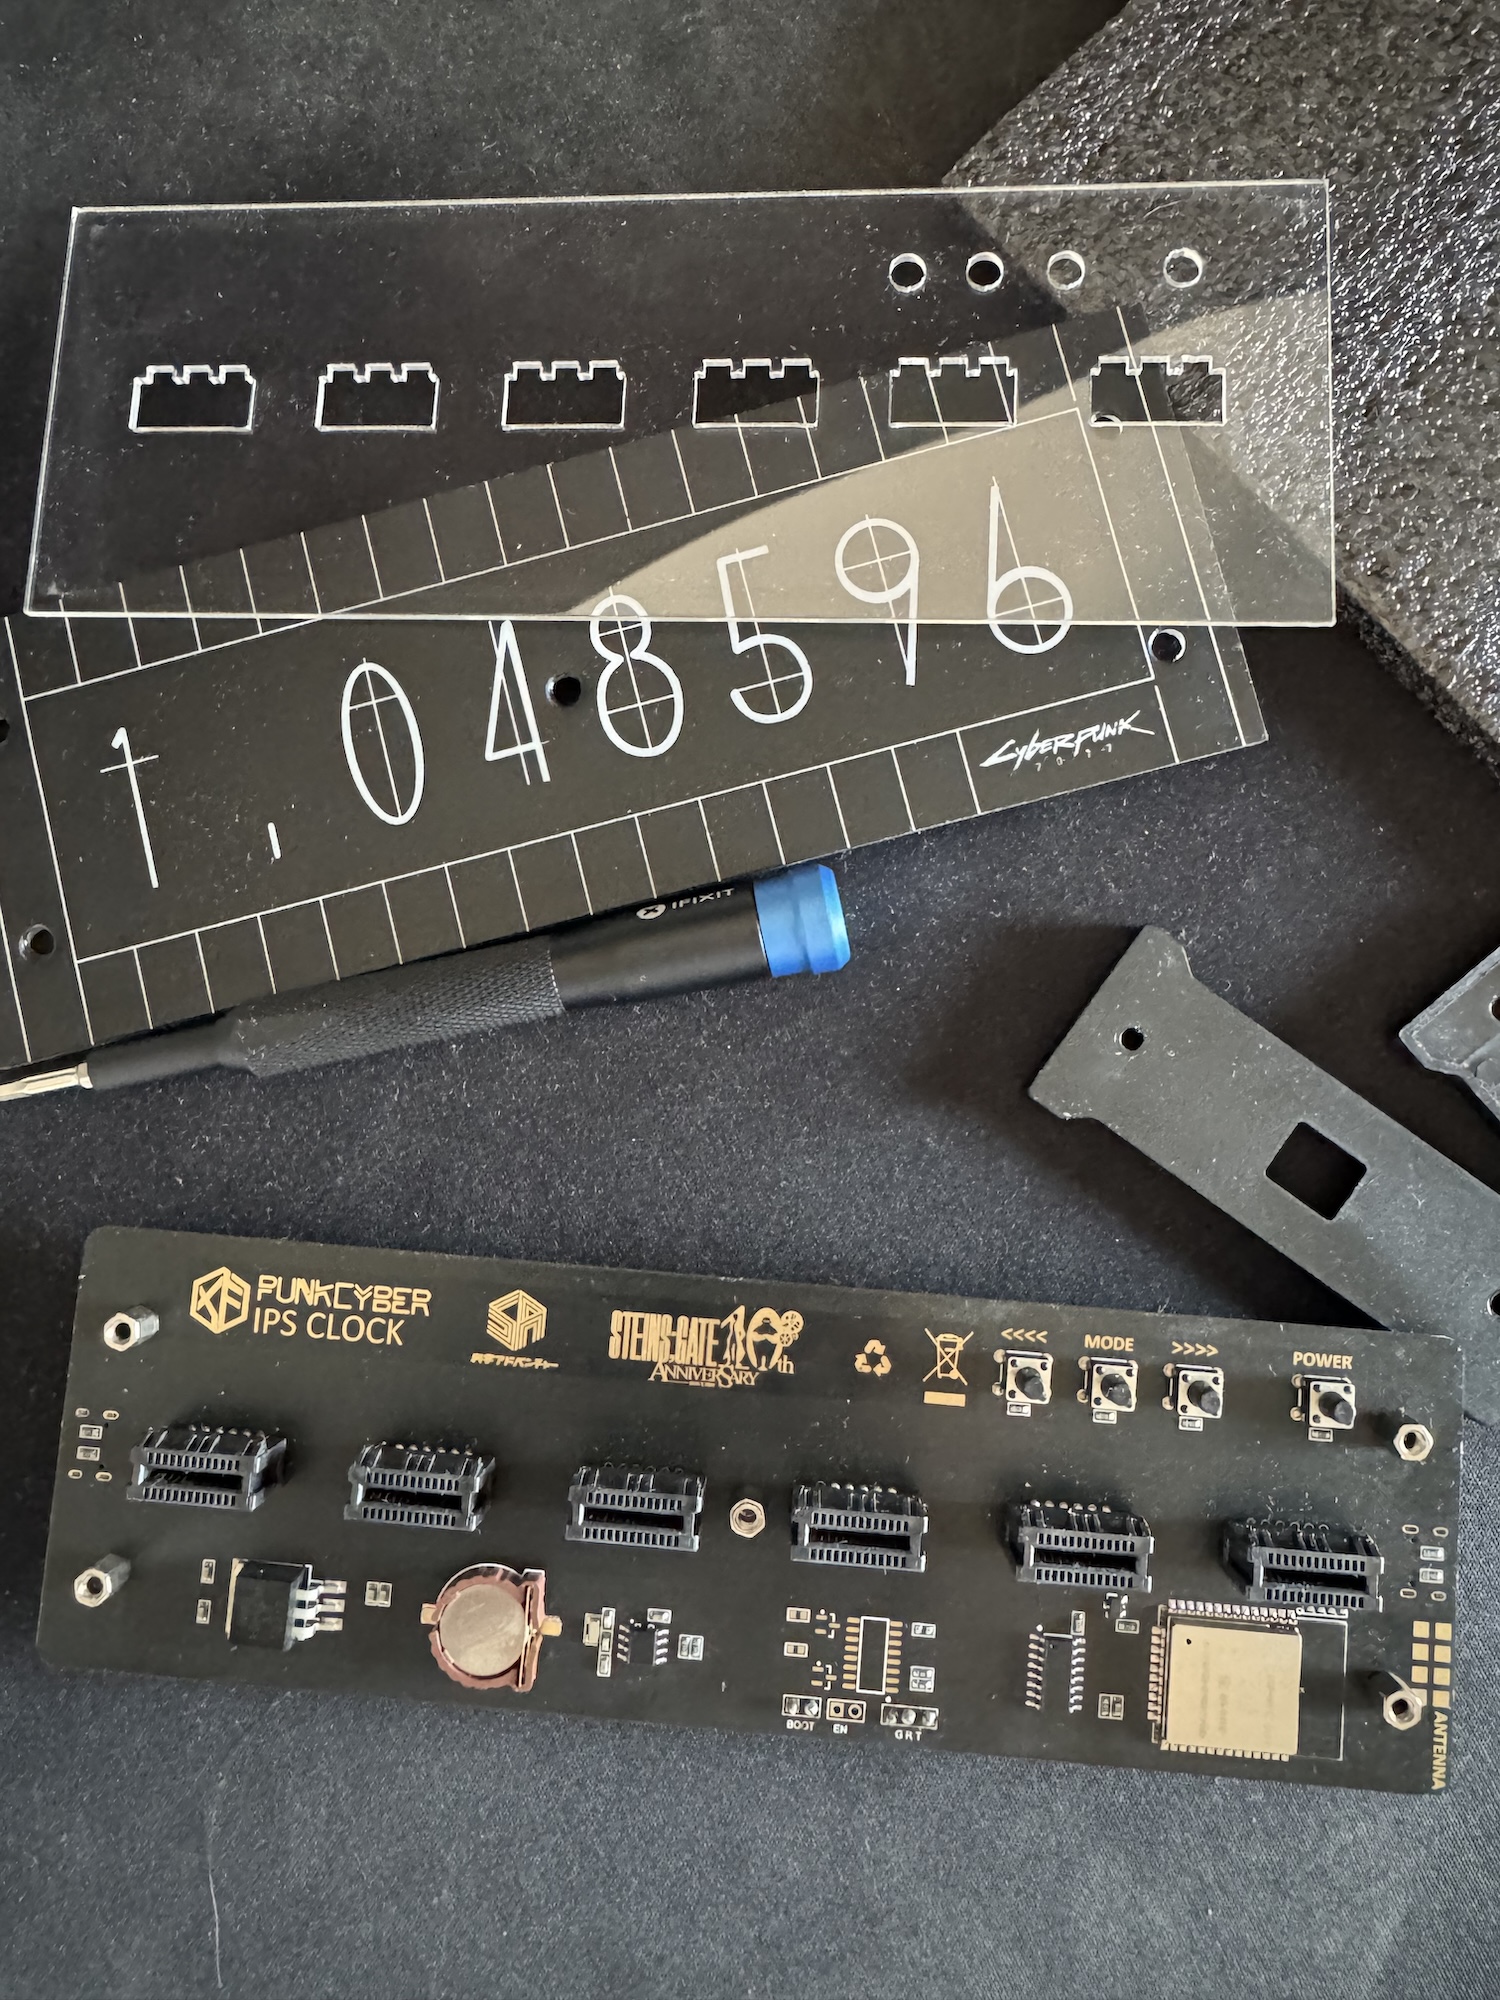
I would have liked to talk about this clock before, but I didn't have a good opportunity to do so. I am doing so now because I needed to update its software and had the chance to take pictures of it while disassembled.
At a glance, a USB-powered device with six small LCD screens and network connectivity seems really cool. However, I immediately noticed some problems: I needed to download a sketchy app to configure it, and all the instructions were in Chinese. The physical buttons could not be used to set the time and so only via Wi-Fi...
Time for investigation
This was not a great start for simply setting the time on a clock. So I immediately searched online to see whether alternative software existed that I could install to run open-source firmware on it. I first looked at the official firmware, but it was impossible to connect the clock to it via Wi-Fi. Since this is a clone version, using the official firmware did not seem like a good idea anyway.
I found EleksTubeHAX, a popular project with cool features: Home Assistant connectivity, synchronisation with the correct time zone via IP, and more. It also contains a wealth of information about all clock versions, including my PunkCyber IPS.
This version has one problem: it has an empty soldering header and is missing a CH340 chip. As you might guess, this chip is necessary to communicate with a PC for downloading and updating the software.
The project's README describes two solutions: use an external UART-to-USB adapter or solder the missing components. I chose the first option because it was easier. I was not very confident in my soldering skills, and I didn't want to break a Christmas gift.
Soldering and connection
I already had a soldering iron, but I still needed a few parts: it was time to place an AliExpress order! I got a FT232RL module with USB-C and some pin headers for a neat setup.
There is not much to explain here: I soldered the pin headers underneath so that they are not visible from the top. They will only be useful when I want to update it, so I will need to disassemble the device to connect the external module.
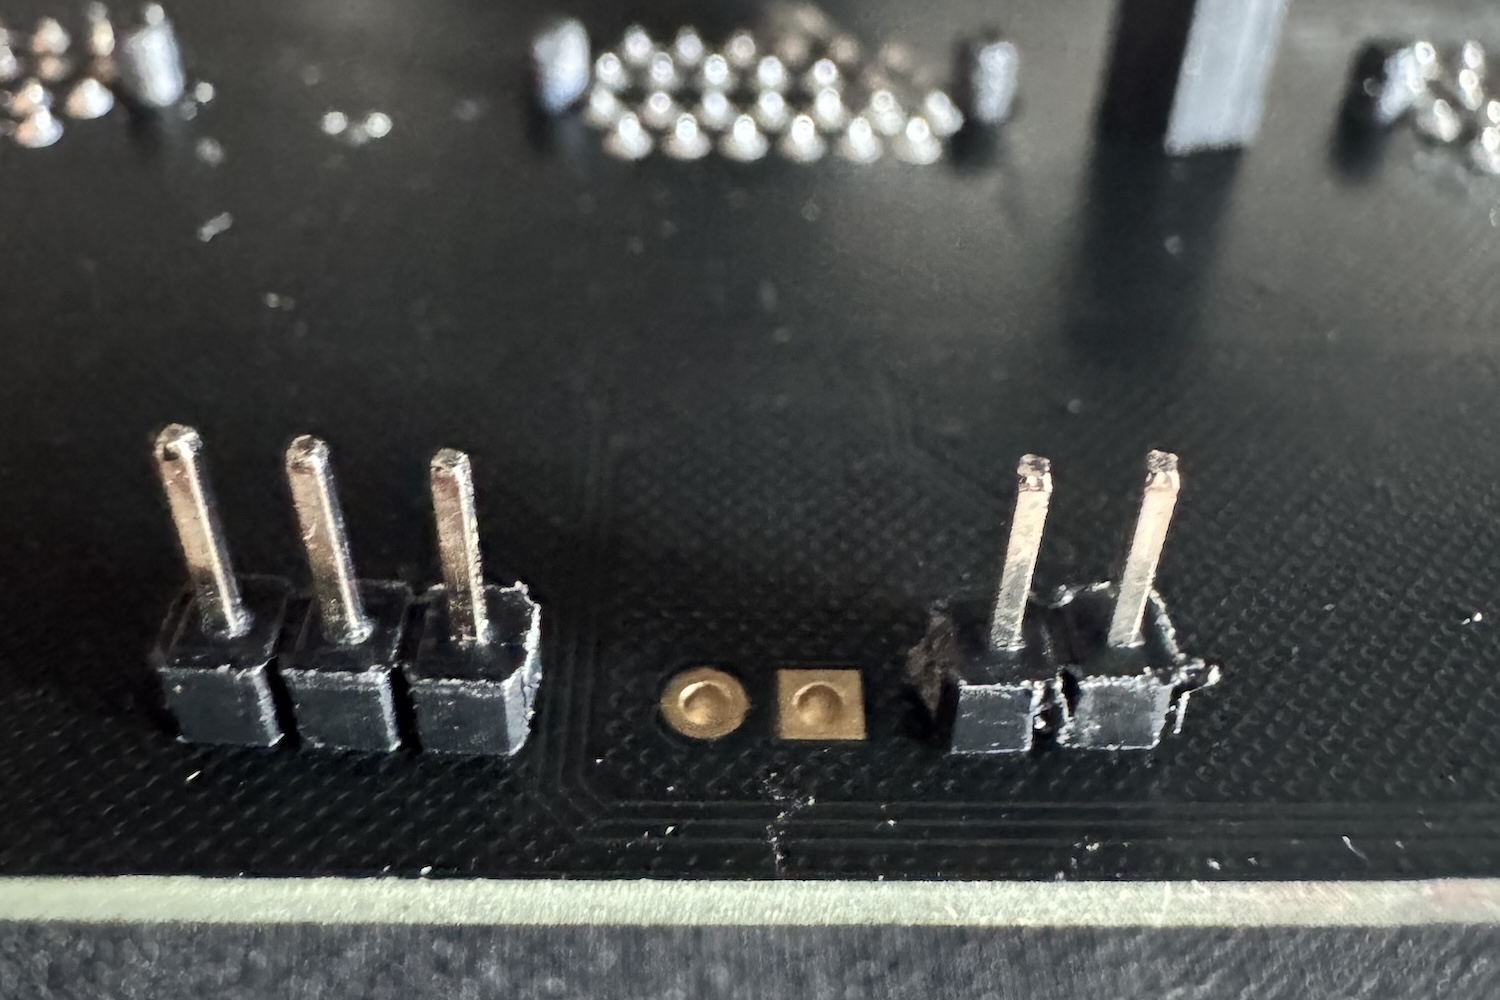
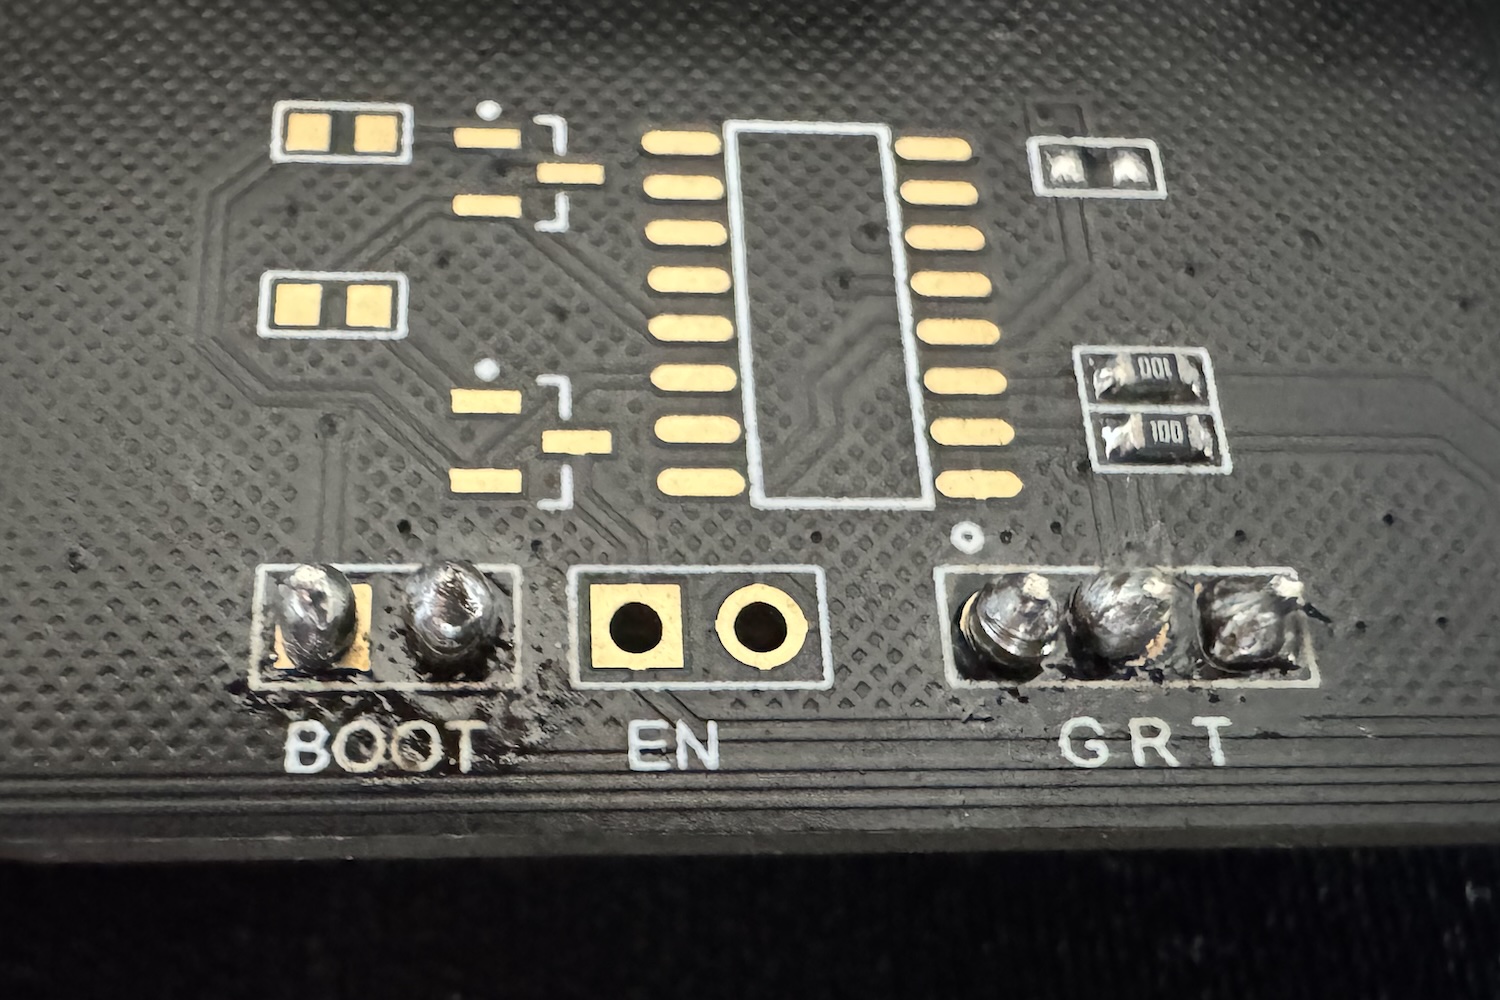
Now I can connect the PCB to the UART board. Ensure that you follow the table below carefully.
| Pin PCB | Pin UART |
|---|---|
| G | GND |
| R | Rx |
| T | Tx |
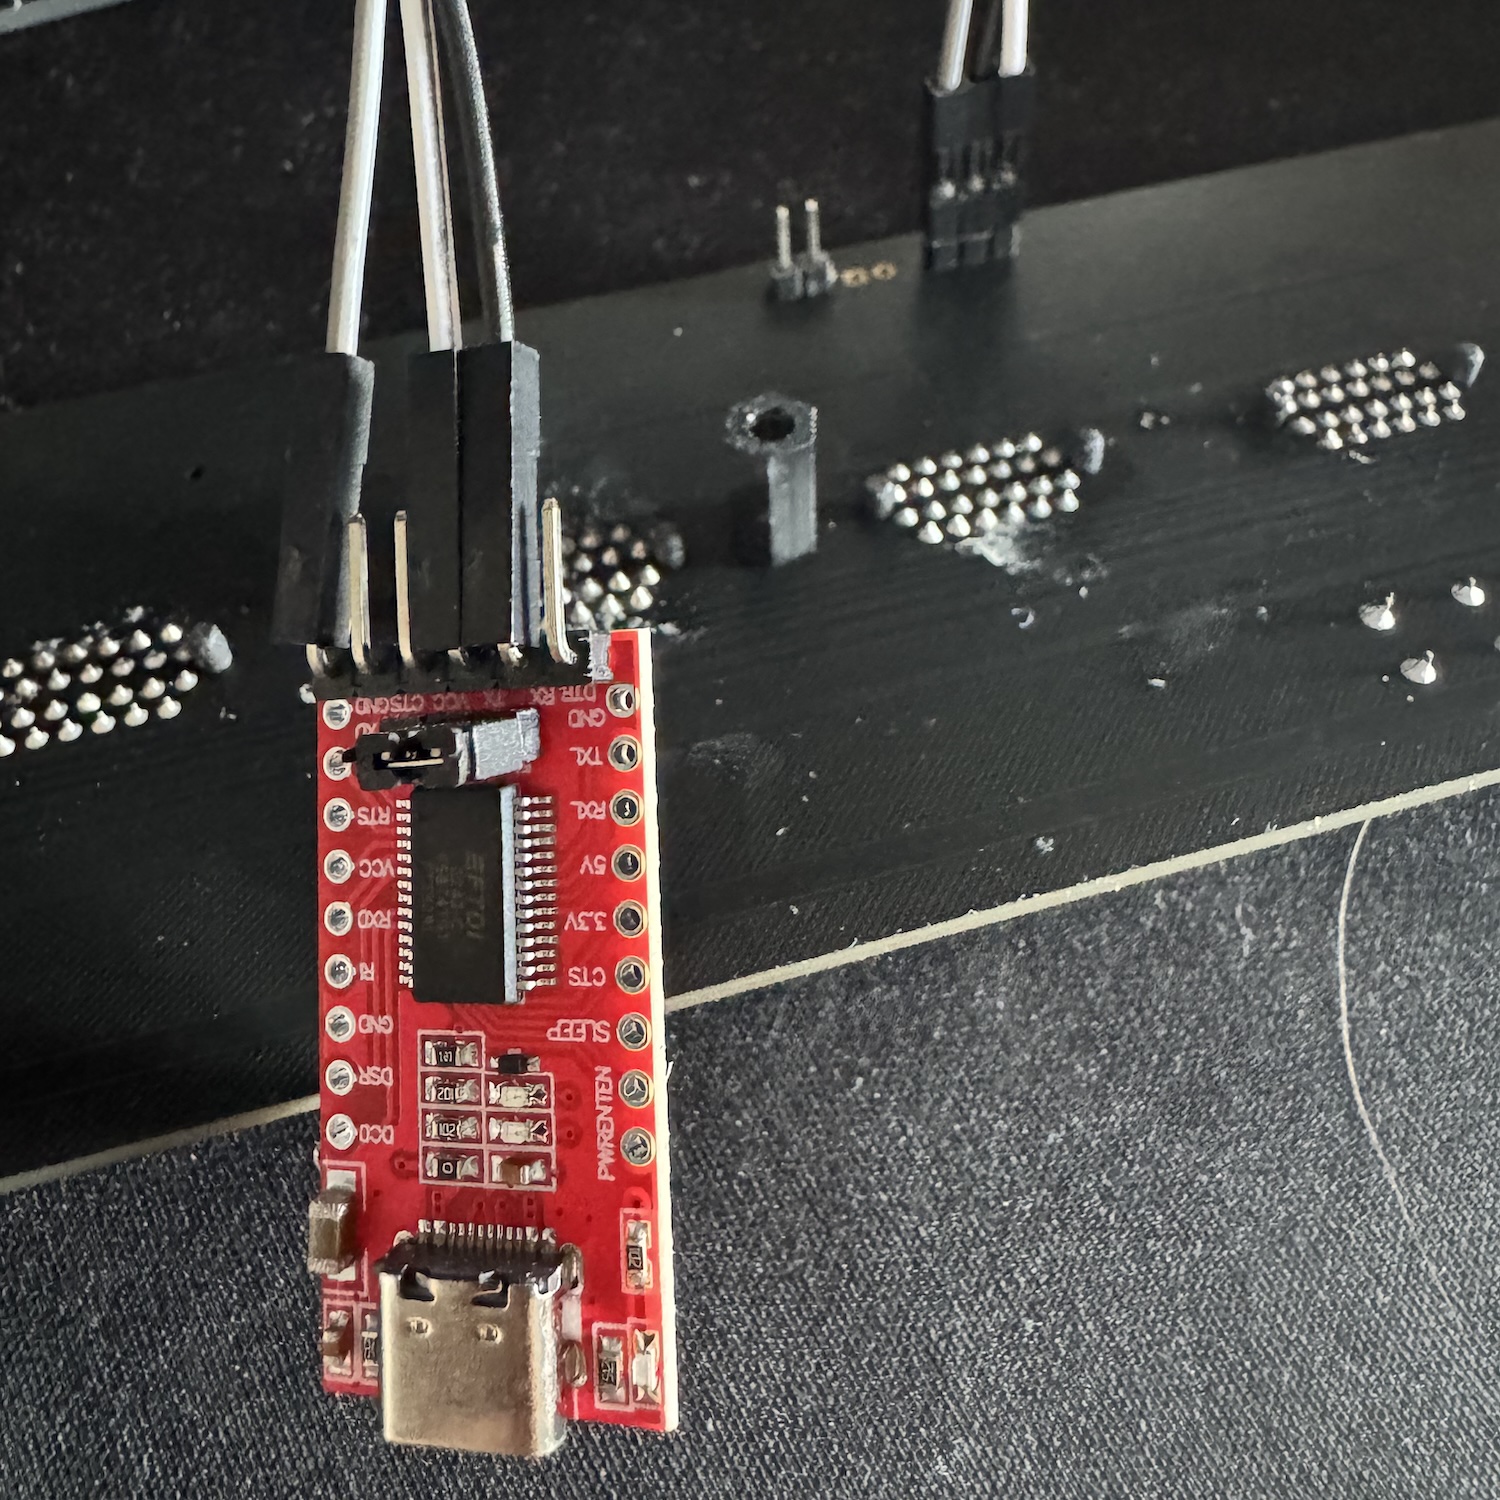
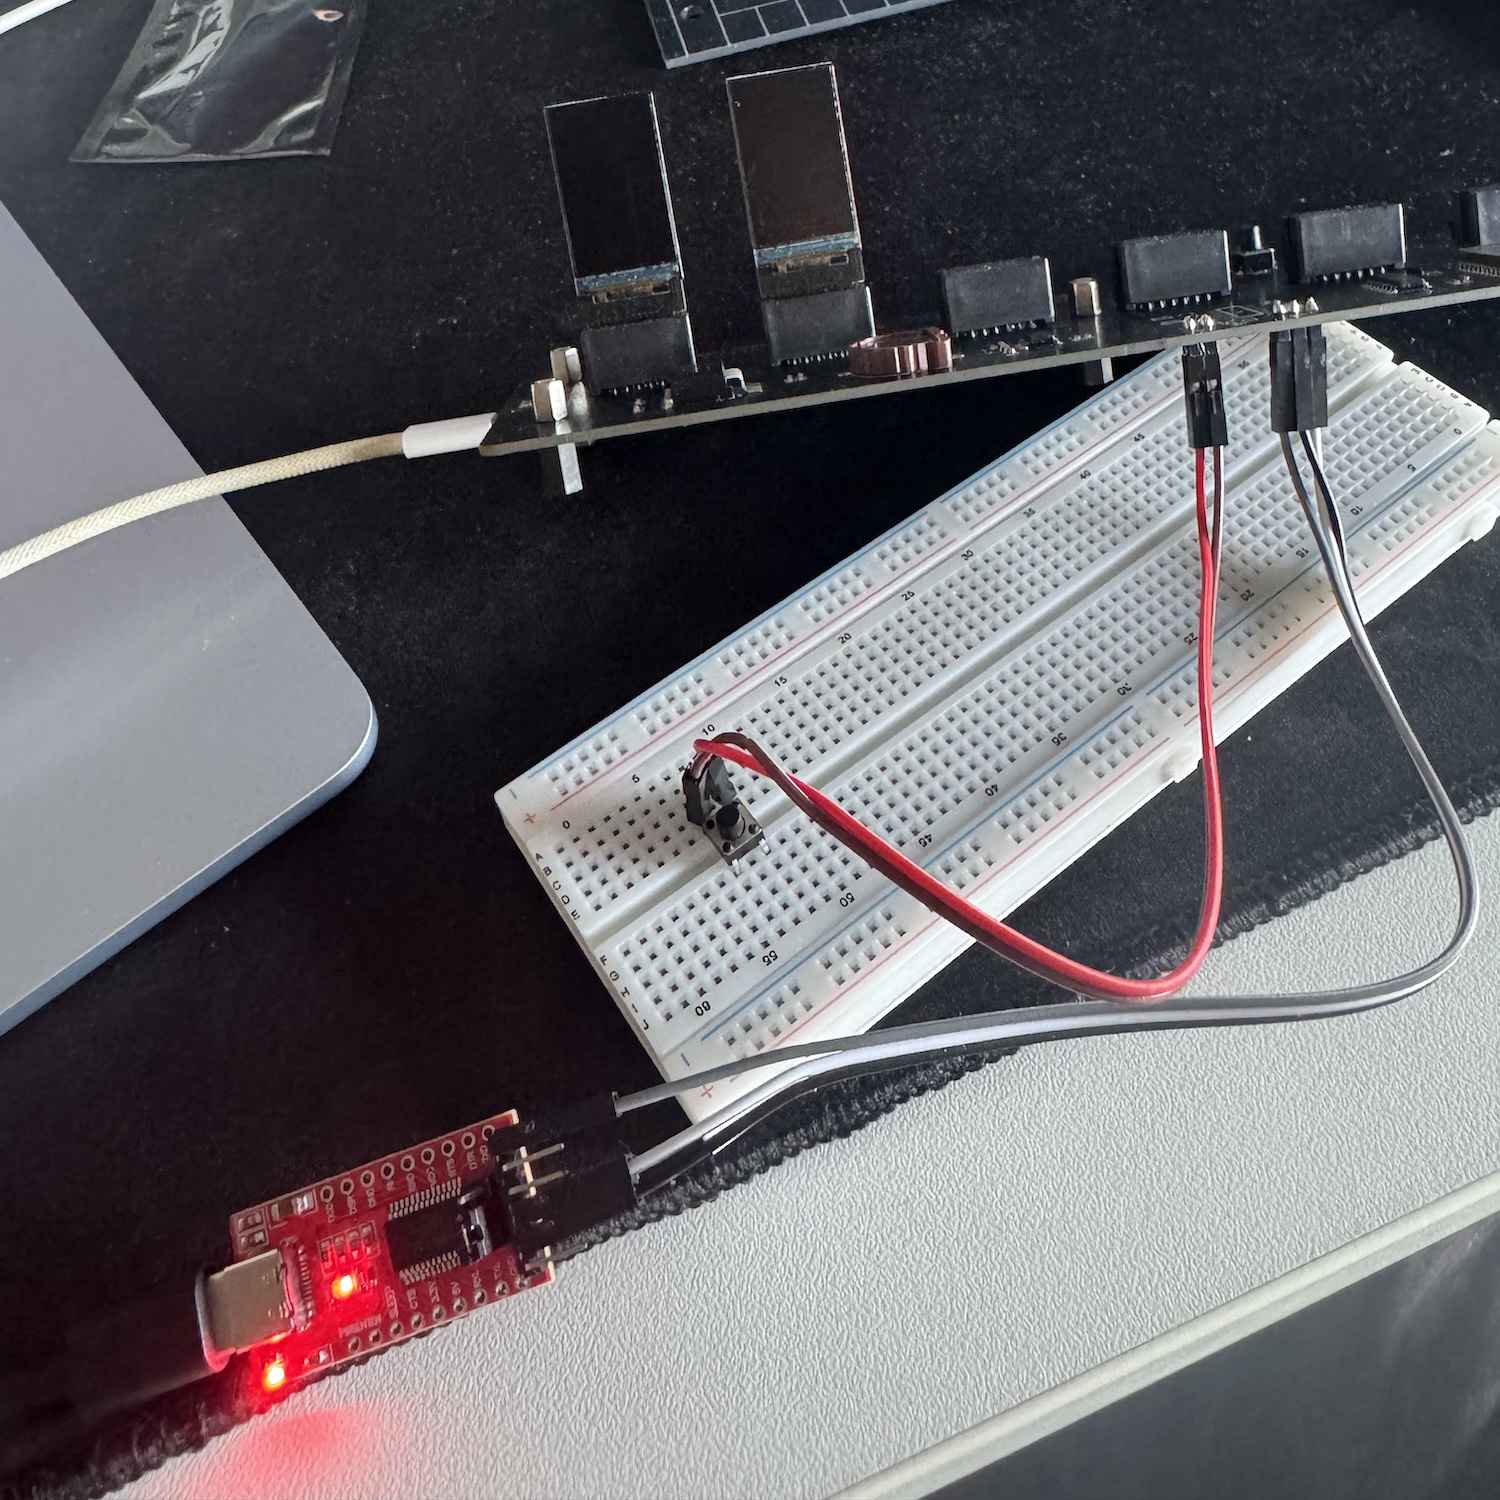
The board needs to be put into download mode. To do that, short and then release the BOOT pin while the device is powered via USB-C. To make this work reliably, I reproduced the setup described in the README with a simple button.
Back up and install the new software
I will not go into all the installation details, since they are documented in the project's README. However, I encountered a few problems worth knowing about. I did the installation on Windows, but I expect it can also be done easily on macOS or Linux.
First, download the latest version of the project's source code. It includes scripts to back up the existing firmware, which is important if something goes wrong. Go to the firmware folder and edit the command file corresponding to your model.
| File | Clock model |
|---|---|
| _ESP32 save flash 4MB.cmd | All clocks with 4MB flash |
| _ESP32 save flash 8MB.cmd | IPSTube |
| _ESP32 save flash 16MB.cmd | MarvelTubes, MarvelTubes Gen2 |
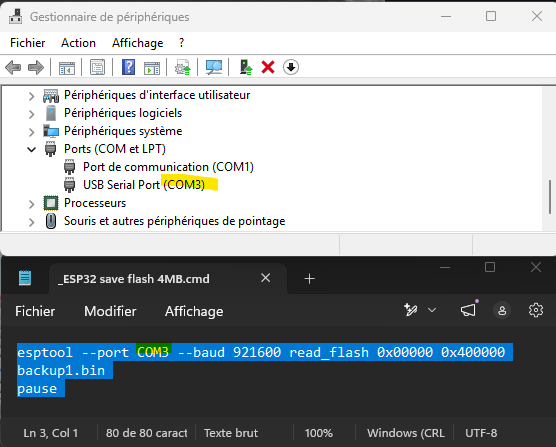
Open Device Manager to find the COM port number, then adjust the command file to use the same number.
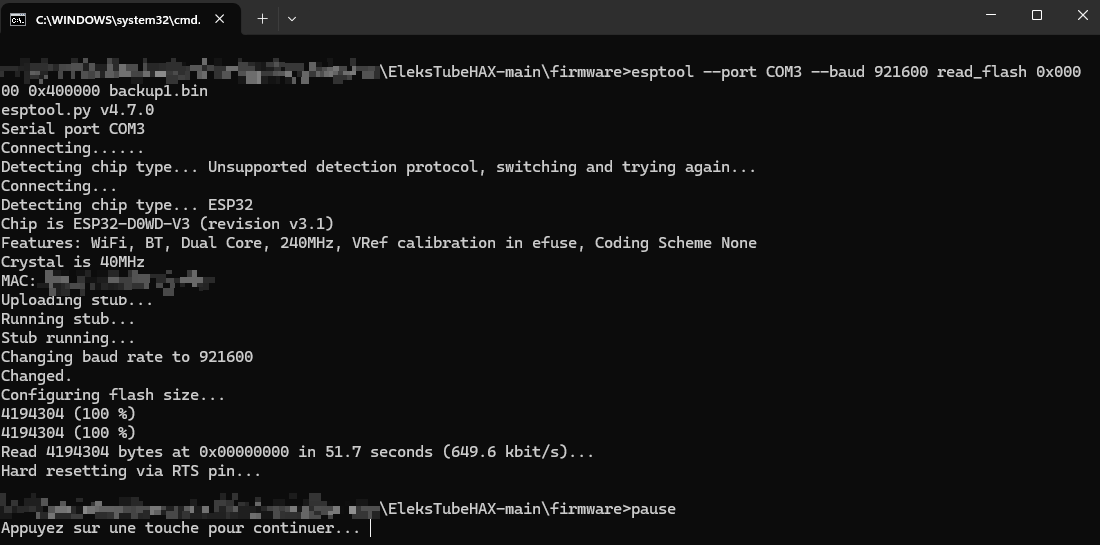
Now run the command file. If everything goes well, you should see something like this:
Install VS Code with the PlatformIO IDE plugin. Open the project folder and rename the file include/_USER_DEFINES - empty.h to _USER_DEFINES.h. Then adjust the settings to match your needs. I only enabled the Home Assistant feature, using the IP address of my Raspberry Pi (which runs Home Assistant OS) and the MQTT settings from the Home Assistant MQTT integration.
Choose the environment corresponding to your model in VS Code's bottom bar, then build and upload the firmware and data. Finally, reboot it by unplugging and reconnecting it.
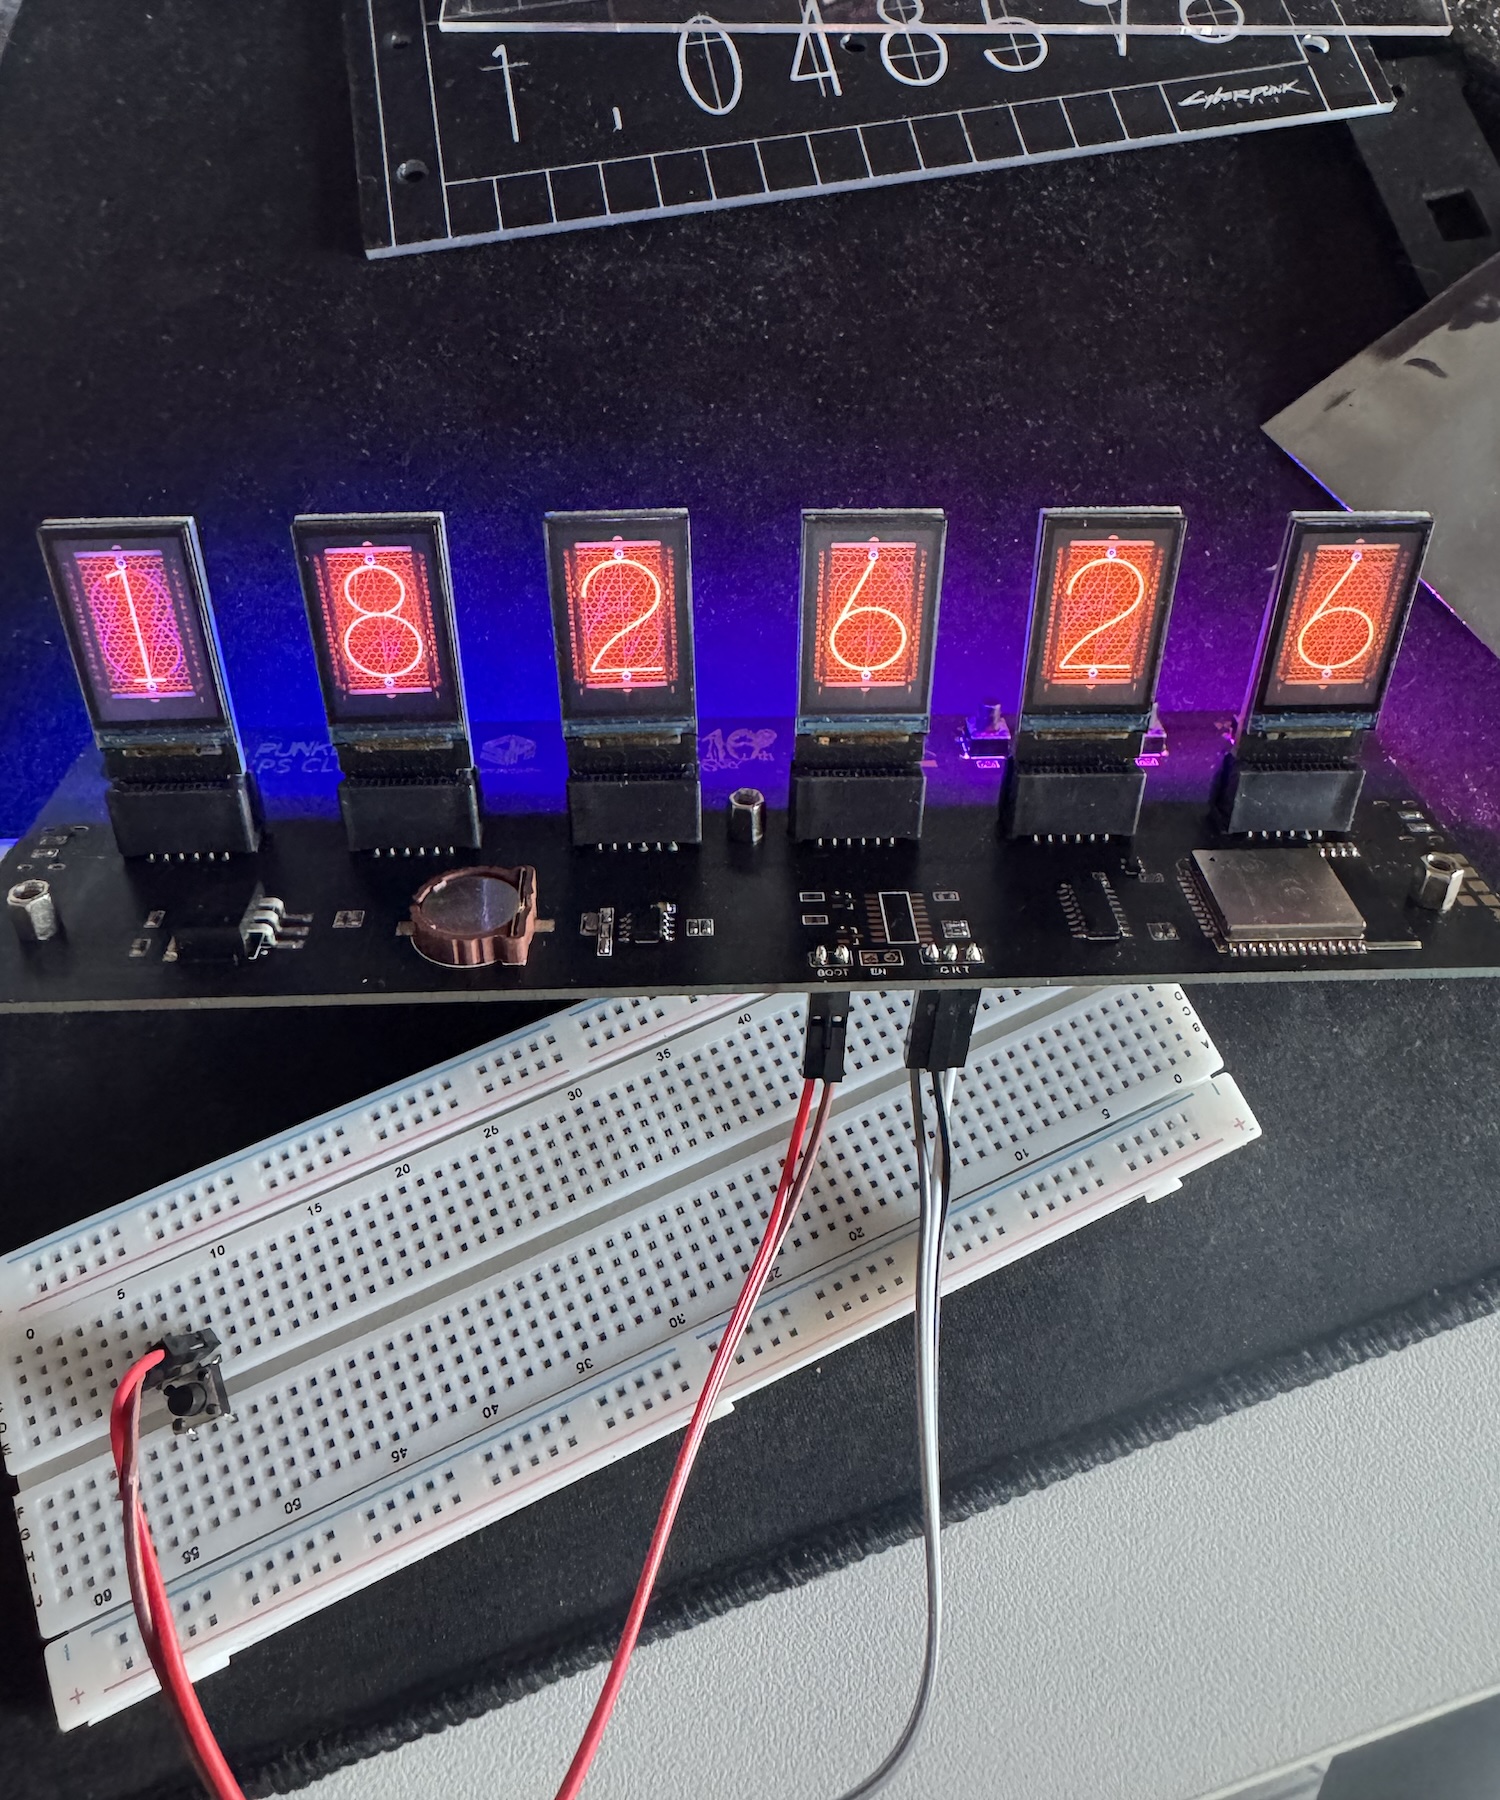
This was not a big modification or side project, but I enjoyed turning an imperfect device into something that fits better with my existing setup. I am really happy with the result: a nice clock sitting below my monitor.